Family traditions are such a big part of the holiday season. Traditions have a way of gathering family and friends together in a way that is so special. For most, it's a way of honoring treasured moments from the past with loved ones that they can no longer be with while making new memories with those that they can.
Building gingerbread houses is one of those activities that gets everyone together and shows off the talents of all. The baker, the architect, the artist, and if you're the lucky one, the taster.
I know I'm painting a little Hallmark movie-type picture here, but getting everyone focused on the project can be a lot of fun (unless your talent is the one of cleaner-upper.)
We're sharing this recipe that's been passed down through four generations and it's one to hold on to.
Ingredients
Dough:
1/2 c butter softened
3/4 c packed dark brown sugar
3/4 c dark molasses
1 egg
2 tsp ground ginger
1 tsp ground cloves
1/4 tsp salt
4 cups all-purpose flour
Icing:
4 c confectioners' sugar
3 tbsp meringue powder
5 to 6 tbsp warm water
Pastry bag
Round pastry tip # 12
Green paste food coloring
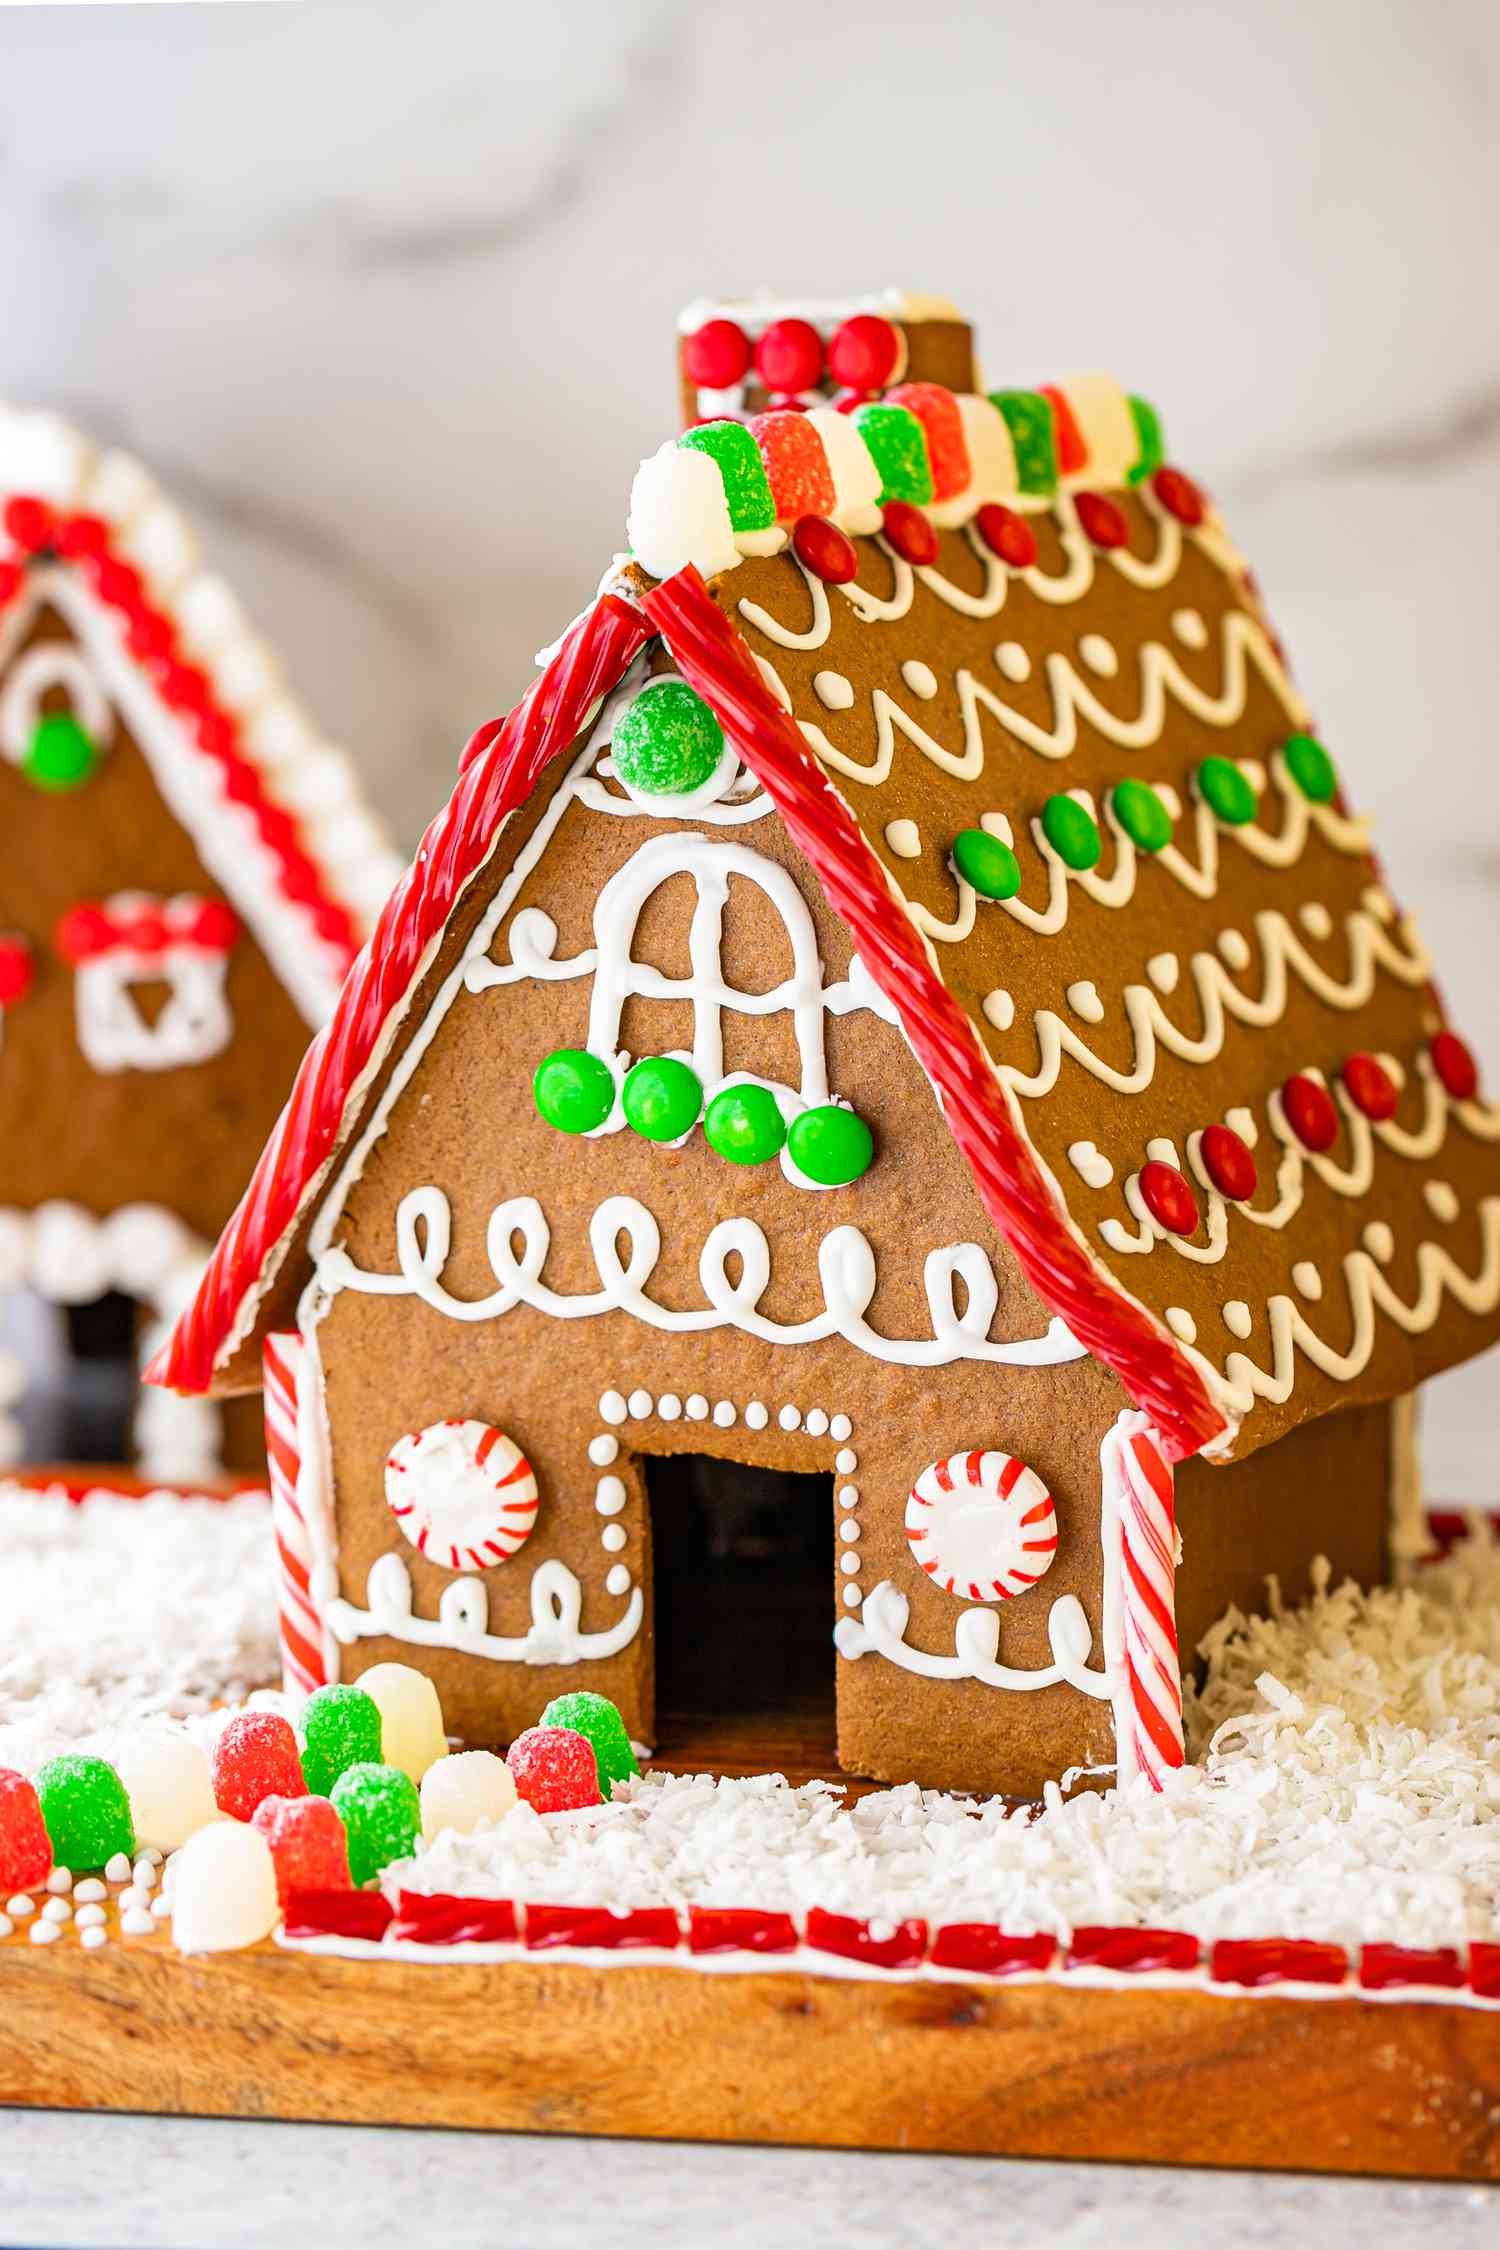
CANDIES: Starlight mints, red-hot candies, m&m's, red shoestring licorice,
Sixlets, sticks striped-fruit gum, Fruit Roll-Ups
Directions
1) In a large bowl, beat butter and brown sugar until light and fluffy. Beat in the molasses, egg, ginger,
cloves and salt. Gradually add flour, 1 cup at a time, until dough forms a ball.
2) Knead dough on a floured surface until smooth but not sticky, adding flour if needed.
Cover and chill for several hours or overnight.
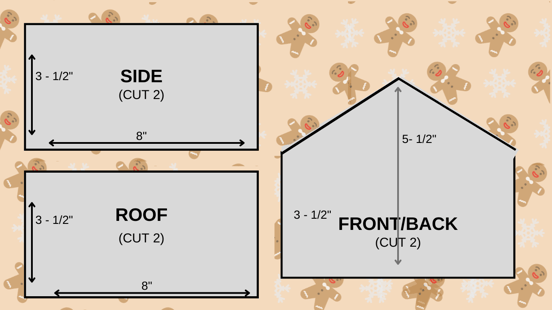
3) Meanwhile, cut out patterns provided below. Line a baking sheet with foil and lightly grease the foil.
Lay a damp towel on the counter; place prepared pan on towel (to prevent slipping). Using a
Heavily-flour a rolling pin, roll out half of dough onto the baking sheet into an 1/8-in. thick rectangle.
Position patterns on dough at least 1/2 in. apart on dough. Cut out two of each pattern with a sharp knife; remove
pattern. Remove dough scraps; cover and save to re-roll if needed.
4) Bake at 350° for 15 minutes or until edges just begin to brown. Do not overbake. Remove from oven;
immediately and place patterns on dough again. Cut around the edges, trimming off excess cookie if necessary.
Cool for 10 minutes or until pieces begin to set. Carefully move pieces to wire racks to cool completely.
Repeat with remaining dough and patterns.
5) In a bowl, beat the confectioners' sugar, meringue powder and 4 tablespoons water on low until
blended. Beat on high for 8-10 minutes or until stiff peaks form, adding additional water,
1 tablespoon at a time, if needed. Place a damp paper towel over icing bowl and cover tightly until
ready to use.
6) To assemble the house frame: Test your cookie pieces to make sure they fit together snugly.
If necessary, carefully trim with a serrated knife. Insert the round pastry tip into the pastry bag;
add icing. Pipe a 3/8-in. wide strip of icing onto the bottom edge of the front piece.
Position on a covered board at least 3-in. from the front edge of the base.
Prop with spice jars for 2-3 minutes or until icing is completely set; remove jars.
7) To add the sides and the back: Pipe icing on the lower edge of one side piece and along one side
edge of the front piece. Align pieces at a right angle, making sure they are as tight as possible. Repeat
with the other side. Pipe icing on the bottom and side edges of the back piece; position with the other
assembled pieces. For added stability, pipe icing along the inside edges of all pieces and corners.
8) To assemble the roof: Working with one side at a time, pipe icing along the top edges of the front,
back and side pieces. Carefully place one roof piece so the roof's peak is even with the points of the
front and back (there will be a small overhang front and back.) Repeat. Let dry completely.
9) Decorate with candies and enjoy your work
 Thank you so much,
Samantha Mendez, for passing along Grandma Sorini's famous recipe.
If you have a favorite recipe you would like to share, we would love to feature it in our recipe blog.